Texas bathroom remodel ideas: real examples and smart tips

TL;DR:
- Careful sequencing and thorough waterproofing are essential for a successful Texas bathroom remodel to prevent costly damage.
- Homeowners should clearly define goals, prioritize quality checks, and hire verified professionals to ensure durability and value.
Choosing how to remodel your bathroom in Texas can feel overwhelming. There are hundreds of tile options, layout decisions, fixture styles, and contractor choices that all need to happen in the right order. Most homeowners stall not because they lack a budget, but because they can’t picture the end result until they see real, specific examples. This article walks you through actual before-and-after remodel stories, a practical decision framework, and the critical construction details that separate a successful Texas bathroom remodel from one that costs you twice.
Table of Contents
- How to evaluate your bathroom remodel goals
- Classic and modern Texas bathroom remodel examples
- Shower conversions and wet-area remodels: what changes and why
- The importance of waterproofing and quality checks
- Our take: what Texas homeowners really learn about bathroom remodels
- Ready to begin your own Texas bathroom remodel?
- Frequently asked questions
Key Takeaways
| Point | Details |
|---|---|
| Clarify your goals | Know your must-haves to get the best remodel outcome and avoid costly changes. |
| Study real examples | Before-and-after Texas remodels reveal practical ideas for all budgets and layouts. |
| Sequence matters | Lock in plumbing, electrical, and waterproofing decisions before tile or finishes. |
| Invest in waterproofing | Proper wet-area prep prevents leaks and protects your remodel investment. |
| Choose contractors wisely | Use platforms with vetted pros for best results and quality assurance. |
How to evaluate your bathroom remodel goals
Before diving into real examples, it’s vital to clarify what you actually want from your project. Skipping this step is one of the most common reasons homeowners end up dissatisfied, even after spending significant money.
Start with one central question: Is your priority aesthetics, functionality, or fixing builder-grade shortcuts from when your home was originally built? Many Texas homes built in the 1990s and early 2000s came with standard builder-grade bathrooms. Single-sink vanities with minimal storage, no natural light, basic white tile, and small shower stalls. These bathrooms aren’t broken, but they’re not ideal either.
Common remodel goals Texas homeowners pursue include:
- Adding a custom walk-in shower to replace an outdated tub-shower combo
- Installing a double vanity for a shared master bathroom
- Improving lighting with recessed fixtures or a new window
- Adding a freestanding soaking tub as a design focal point
- Replacing dated tile with a more current aesthetic
- Installing grab bars and zero-threshold showers for aging-in-place needs
- Improving cabinet storage with built-in niches, shelving, or pull-out drawers
Each goal carries different costs, timelines, and trade requirements. Adding a window, for example, requires a framing contractor and may involve HVAC adjustments. Installing grab bars correctly for aging-in-place use means anchoring into studs or using specialty blocking behind drywall, which has to be planned before walls are closed up.
Your remodel goals should also reflect who lives in the home and what the future holds. A young family may prioritize durability and easy cleaning. A homeowner planning to sell in three years wants updates that boost resale value. Someone who plans to age in place needs safety features built into the design from day one. The HGTV before-and-after bathroom gallery covers remodels across all of these goals, offering clear problem-to-solution examples for everything from dark and cramped bathrooms to impractical layouts that needed a full reconfiguration.
Understanding your personal priorities also protects you when you start reviewing bids. A contractor who excels at cosmetic refreshes may not have strong plumbing rough-in experience for a major layout change. When you know your goals precisely, you can ask the right questions and compare bids more accurately. Tools like streamlined project bidding help you organize exactly this kind of comparison before you commit.
Pro Tip: Create a simple three-column list labeled “must-haves,” “nice-to-haves,” and “deal breakers” before you contact a single contractor. Must-haves are non-negotiable features. Nice-to-haves are upgrades you’d accept if the budget allows. Deal breakers are things that, if included, would push you over budget or conflict with your goals. Share this list with every contractor so their bids reflect your actual priorities.
Using a clear Texas contractor checklist alongside your goals list gives you a structured way to vet every professional before work begins.
Classic and modern Texas bathroom remodel examples
With your personal goals in mind, these real-life Texas remodels illustrate the spectrum of results you can achieve.
Example 1: Small, dark bathroom transformed with light and glass
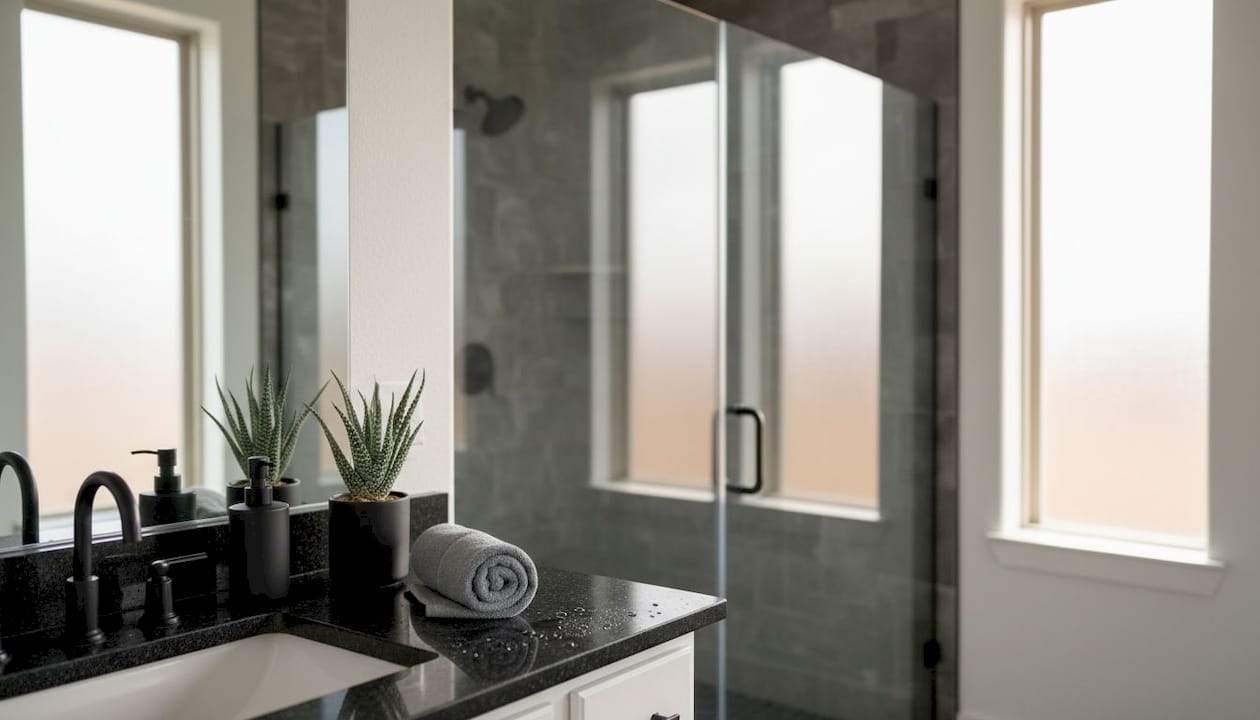
One of the most common Texas bathroom problems is a windowless interior bathroom with poor lighting and a cramped tub-shower combo. In a typical before scenario, the space feels dated: a single vanity light strips harsh shadows across the mirror, a builder-grade shower curtain blocks sight lines, and beige tile makes everything feel smaller.
The after: A glass shower enclosure replaces the curtain rod setup, immediately making the room feel twice as large by opening the sight line. A new vanity light bar with warm-toned bulbs replaces the single overhead fixture. White subway tile and a pale grout add brightness without a major layout change. The visual transformation is dramatic even though no walls moved.
Example 2: Spring, TX master bath renovation
A detailed Spring, TX bathroom remodel case study demonstrates exactly how trade sequencing works in practice. Even when the overall layout stays roughly the same, the crew had to reframe, rough-in new plumbing, and reconfigure the electrical before any finish work could begin. The project included enlarging the shower footprint, installing a freestanding soaking tub, and completely reworking the lighting plan. What appeared to be a “cosmetic update” on the surface actually required significant structural and plumbing coordination underneath.
This is an important insight for Texas homeowners. Many people budget for finishes and fixtures without accounting for the rough-in work that often makes up 30 to 40 percent of project costs.
Classic update vs. modern overhaul: what each includes
| Style | Key features | Typical cost range | Estimated timeline |
|---|---|---|---|
| Classic update | Subway tile, double vanity, neutral palette, updated fixtures | $8,000 to $15,000 | 2 to 3 weeks |
| Modern overhaul | Wet zone, bold large-format tile, floating vanity, soaking tub | $18,000 to $35,000+ | 4 to 6 weeks |
| Partial refresh | New vanity, lighting, hardware, paint | $2,500 to $7,500 | 1 week |
Classic updates are popular for their timeless appeal and faster project timelines. Modern overhauls cost more and take longer, but they create a spa-quality feel and typically deliver higher resale value in competitive Texas markets like Austin, Dallas, and Houston.
The HGTV before-and-after gallery shows remodels at different budget levels and confirms that some of the most impactful changes come from layout-smart decisions, not just premium materials.
Classic bathroom update features:
- Subway tile in a simple brick or vertical stack pattern
- Double sink vanity with shaker-style cabinet doors
- Neutral color palette (whites, warm grays, soft greiges)
- Chrome or brushed nickel fixtures throughout
- Simple frameless or framed mirror above the vanity
Modern overhaul features:
- Large-format tile (24x48 or larger) on floors and walls
- Floating vanity with vessel sinks or undermount basins
- Open wet zone with a curbless shower entry
- Bold accent tile, geometric patterns, or textured stone
- Matte black or brushed gold fixtures as a design statement
Reviewing contractor bid examples from similar Texas projects can help you benchmark what these features cost in your specific region.
Shower conversions and wet-area remodels: what changes and why
Modernizing with a new shower or open wet area is one of the most popular and complicated upgrades Texas homeowners pursue.
A shower conversion, specifically moving from a tub-only setup to a walk-in shower, requires far more than removing the tub and setting new tile. Understanding what happens below and behind the walls helps you plan accurately and avoid cost surprises.
Why shower conversions go deeper than surface work
The existing tub sits in a framed alcove or on a sub-floor platform. When you remove it, you expose the drain configuration, which almost always needs to be relocated or modified for a shower drain. The supply lines may also need repositioning, especially if you’re adding a rainfall showerhead, body sprays, or a handheld fixture. The wall framing behind the tub surround is often not waterproofed for shower use without a proper membrane system.
A detailed look at a pink-and-white bathroom redo highlights a key methodology principle: when converting a tub-only area to include a shower, plumbing decisions and waterproofing requirements drive what must be removed and reworked before any finishes go in. This sequencing is not optional. It’s the foundation of a durable result.
Step-by-step: a typical tub-to-shower conversion
- Demo phase: Remove the existing tub, surround tile or panels, and any damaged substrate. Inspect the subfloor for water damage or soft spots before proceeding.
- Plumbing rough-in: Relocate or modify the drain to match the new shower configuration. Reposition supply lines for new showerhead locations. This work requires a licensed plumber in Texas.
- Electrical rough-in: Update exhaust fan placement if needed, add recessed lighting circuits, or install GFCI outlets in the proper locations per Texas code.
- Framing and substrate: Install cement board or a comparable moisture-resistant backer on walls. Frame any niche shelving or bench structures.
- Waterproofing: Apply a continuous waterproofing membrane over all surfaces in the wet zone. This step is critical and must be inspected before tile begins.
- Tile installation: Set floor tile first with proper slope toward the drain, then wall tile. Allow full cure time before grouting.
- Fixtures and finishes: Install the showerhead, valve trim, glass enclosure or door, and any hardware after tile is fully cured.
Plumbing and waterproofing must be finalized and inspected before tile work begins. Reversing this order is one of the leading causes of costly rework in bathroom remodels.
Coordinating trades across plumbing, electrical, tile, and glass installation is where many bathroom remodels run into scheduling delays. Having a clear project timeline that accounts for inspection holds and material lead times will keep your project moving.
Pro Tip: Always budget an extra 10 to 15 percent of your total project cost as a contingency for unexpected plumbing issues. Texas homes built before 1990 frequently have cast iron drain lines that are corroded or undersized. Discovering this after demo begins is not unusual, and addressing it properly is far cheaper up front than dealing with a leak years later.
The importance of waterproofing and quality checks
With so much at stake in wet areas, proper waterproofing and finish checks are non-negotiable.
Waterproofing is the part of a bathroom remodel that no one sees after the tile goes in. That invisibility is exactly what makes it so easy to skip or rush, and so catastrophic when it fails. A leak behind tile can cause structural damage, mold growth, and extensive floor and ceiling repairs in the room below, all of which cost far more than doing the waterproofing correctly the first time.
Most-overlooked quality checks in Texas bathroom remodels:
- Confirming waterproofing membrane coverage extends up the wall at least 6 inches above the shower floor (the upstand height requirement)
- Verifying that the shower floor tile is sloped correctly toward the drain, typically a quarter-inch drop per foot
- Testing the shower pan for leaks by plugging the drain and filling with water for 24 hours before tile is set
- Checking that fixtures are centered and level before final installation
- Confirming that niche shelves are waterproofed before tile is applied inside them
According to a detailed bathroom remodel planning guide, waterproofing in wet zones must be properly executed using membrane systems, and a leak test of the shower pan before tiling is a critical step that is often skipped on rushed projects.
Waterproofing and quality check responsibility table
| Task | Responsible party | When it happens |
|---|---|---|
| Waterproofing membrane application | Tile setter or waterproofing specialist | Before any tile work begins |
| Shower pan leak test | Plumber or tile setter (witnessed by homeowner) | After membrane, before floor tile |
| Drain slope verification | Tile setter | During floor tile installation |
| GFCI outlet installation | Licensed electrician | Rough-in phase |
| Fixture alignment check | General contractor or homeowner | Before final fixture install |
| Grout sealing | Tile setter | After grout has fully cured |
As a homeowner, your role is to ask for confirmation at each milestone before approving the next phase of work. Don’t assume these checks happen automatically. Ask your contractor specifically when the waterproofing inspection will occur and whether you can be present.
Understanding the benefits of contractor bidding platforms helps you see why hiring vetted professionals matters here. Verified contractors have track records you can review, and platforms that hold milestone-based payments give you natural checkpoints to confirm quality before releasing funds.
Our take: what Texas homeowners really learn about bathroom remodels
Most articles about bathroom remodels focus on the fun parts: tile choices, fixture styles, and color palettes. Those details matter, but they’re rarely what separates a smooth remodel from a frustrating one.
In our experience working with Texas homeowners across dozens of markets, the most underestimated aspect of any bathroom remodel is sequencing. The order in which work happens is not just a contractor preference. It’s a technical requirement. Waterproofing must come before tile. Rough-in plumbing must be set before walls close. Electrical must be inspected before drywall. When any of these steps are rushed or reversed to save time, the project almost always pays for it later.
Layout changes are another area where homeowners consistently underestimate the real cost. Moving a toilet two feet might seem simple, but it often involves cutting into the concrete slab (common in Texas slab-on-grade construction), which requires a licensed plumber, concrete work, and significant additional time. Many homeowners describe a layout change as “just shifting things around” until they see the scope breakdown from a qualified contractor.
What’s equally telling is what homeowners wish they had done differently. The most common regret we hear is not pushing hard enough on quality checks before tile went in. Once tile covers the walls and floor, you’re trusting that the work behind it was done correctly. If it wasn’t, you won’t know until water starts showing up somewhere it shouldn’t, sometimes months or years later.
Online renovation platforms are changing how homeowners manage this risk. When bids are documented, contractor credentials are verified, and payment is tied to milestones, homeowners have real leverage to enforce quality standards at every phase.
Pro Tip: Document everything at each construction milestone with photos and receipts. Photograph the waterproofing membrane before tile goes in. Photo the plumbing rough-in before walls close. This documentation protects your investment, simplifies warranty claims, and gives you clear evidence if a dispute arises. It takes five minutes at each phase and can save thousands.
Ready to begin your own Texas bathroom remodel?
Inspired to start? Here’s how you can apply what you’ve learned and find the right Texas partners for your own remodel journey.
You’ve seen the real examples, learned the sequencing rules, and now understand what makes a Texas bathroom remodel succeed. The next step is connecting with the right professionals. BidWolf makes this process straightforward. You can post your bathroom remodel project and receive competitive bids from experienced, verified Texas contractors in your area. No cold calls. No guessing about who’s qualified.
When you post on BidWolf, you can review contractor profiles, compare past project examples, and communicate directly through built-in messaging before you commit to anyone. This transparency means you hire with confidence, not just hope. Ready to move from inspiration to action? Find a vetted Texas contractor who can bring your remodel vision to life on time and within budget.
Frequently asked questions
What is the average timeline for a bathroom remodel in Texas?
A typical bathroom remodel in Texas takes between 2 to 4 weeks, depending on scope, custom features, and whether wet-area plumbing is reworked. Projects with layout changes or complex trade sequencing like the Spring, TX case study often run longer due to rough-in inspections and material lead times.
What mistakes are most common in DIY bathroom remodels?
Skipping waterproofing steps or making improper plumbing changes are the most costly DIY mistakes, often requiring expensive repairs. A proper waterproofing membrane and leak test before tiling the shower pan is a step that should never be skipped, even on smaller projects.
How can I find reliable contractors for a bathroom remodel in Texas?
Use a vetted bidding platform and review completed project portfolios to compare past results and references. Verified credentials, documented bids, and milestone-based payments give you real protection throughout the project.
Is it worth converting a tub to a walk-in shower?
If you rarely use the tub, a walk-in shower adds modern style and daily convenience. However, it requires careful attention to waterproofing and rough plumbing before any finish work begins, so budget accordingly and hire experienced professionals.