

How to Plan a Renovation: Your 2026 Step-by-Step Guide

TL;DR:
- Thorough planning before construction is essential to prevent costs and schedule overruns during a home renovation. Defining a detailed scope, building a realistic budget with contingency, and managing permits and sequencing are crucial steps. Effective project management involves clear communication, milestone payments, and early decision-making to ensure successful completion.
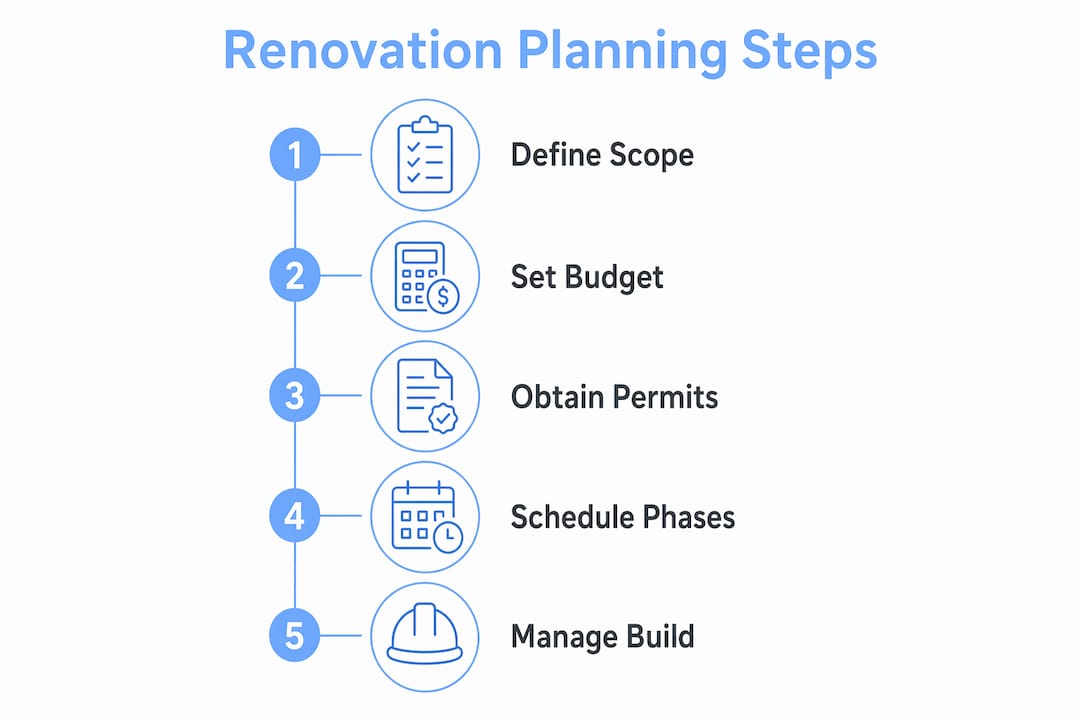
Knowing how to plan a renovation is a step-by-step process of defining a clear scope, building a realistic budget, securing permits, sequencing trades correctly, and managing contractors with documented milestones. Homeowners who skip any of these steps face cost overruns, schedule delays, and disputes with contractors. The good news is that thorough planning before a single wall comes down is the single most effective way to protect your investment. This guide walks you through each phase with the specificity you need to stay on budget and on schedule.
How do you define the renovation scope clearly?
A written scope of work is the foundation of every successful renovation. Without it, contractors bid on different assumptions, costs balloon, and disputes become inevitable. Your scope document should describe exactly what work will be done, what will not be done, and what materials or finishes you expect.

A well-structured scope covers these core components:
| Scope Component | Example |
|---|---|
| Work included | Remove existing tile, install new cement board, lay 12x24 porcelain tile |
| Work excluded | Painting walls, replacing vanity light fixture |
| Items reused | Existing bathtub, door hardware |
| Items replaced | Shower valve, toilet, all floor tile |
| Finish level | Builder-grade vs. mid-range vs. premium fixtures |
| Structural or mechanical changes | Relocate drain, add GFCI outlets |
Separating “in scope” from “out of scope” is not just organizational. It standardizes every contractor bid you receive, so you compare apples to apples. A homeowner who asks three contractors to bid a kitchen remodel without a written scope will get three completely different numbers, making it impossible to evaluate fairly.
Finish level deserves special attention. The difference between builder-grade and premium cabinetry alone can double the cost of a kitchen renovation. Decide your finish level before you request any bids, and write it into the scope document.
Pro Tip: Use a renovation planning checklist to build your scope line by line. Checking off each element forces you to make decisions on paper before they cost money on site.
How to build a realistic renovation budget with contingency
Labor cost represents about 65% of total project cost, with materials making up the remaining 35%. That ratio surprises most homeowners who focus on material prices when shopping. Hard costs, which include labor and materials, form 70–80% of the total budget. Soft costs, which cover design fees, permits, and inspections, account for 20–30%.
Group your budget into these categories for clarity:
- Structure: Framing, demolition, concrete, waterproofing
- Mechanical: Electrical, plumbing, HVAC rough-in and trim
- Finishes: Flooring, tile, paint, millwork, cabinetry
- Fixtures and appliances: Sinks, faucets, lighting, appliances
- Fees: Permits, design, engineering, inspections
- Contingency: Reserve fund for unknowns
Contingency is not optional. Industry experts recommend setting aside 10–20% for newer homes and 15–30% for older homes or those with structural unknowns. Older homes regularly reveal surprises behind walls, including outdated wiring, lead pipes, and water damage. That contingency fund is what keeps the project moving when those surprises appear.
Track three numbers for every line item: estimated cost, committed cost (signed contracts or purchase orders), and actual cost (invoices paid). This three-column approach gives you a live picture of where money is going. Common budgeting mistakes include forgetting permit fees, underestimating labor for complex finishes, and treating contingency as a slush fund for upgrades rather than a true reserve.
Pro Tip: Read a detailed renovation budget guide before finalizing your numbers. Understanding cost categories in advance prevents the most common budget mistakes.
What are permit requirements and how do you manage the process?
Permits protect you legally and financially. Work done without required permits can void homeowner’s insurance, create problems at resale, and require costly demolition to satisfy inspectors after the fact. The permit requirement is not a bureaucratic inconvenience. It is a legal record that the work was done correctly.
Common renovation triggers that require permits include:
- Structural changes: removing or adding walls, altering load-bearing elements
- Electrical work: new circuits, panel upgrades, service changes
- Plumbing: relocating drains or supply lines, adding fixtures
- Mechanical: new HVAC systems, ductwork modifications
- Additions or changes to the building envelope: windows, doors, roofing
Projects involving structural changes should start planning 6–12 months before target completion. Design alone takes about 2 months, and permit approval typically takes 6 weeks. Homeowners who start the permit process late push every downstream trade back with it.
The licensed contractor who pulls the permit carries legal responsibility for the work meeting code. This matters when you hire. Verify that your contractor is licensed and willing to pull permits in their name. A contractor who asks you to pull your own permit as a homeowner is transferring liability to you.
Inspections happen at defined milestones: rough framing, rough electrical, rough plumbing, insulation, and final. Schedule each inspection before covering the work. Failing to call for an inspection at the right stage means tearing open finished walls later.
Pro Tip: Contact your local building department early, before hiring any contractor. Ask for a permit checklist specific to your project type. Many jurisdictions post these online, and getting the list in advance prevents application delays.
How do you sequence and schedule renovation phases effectively?
Failing to follow the correct sequence of trades is the most expensive mistake homeowners make. It causes rework, schedule disruptions, and contractor disputes. The standard build order exists because each trade depends on the one before it.
The correct sequence for most renovations runs as follows:
- Demolition: Remove existing finishes, fixtures, and any structural elements
- Structural work: Framing, beam installation, foundation repairs
- Rough-in trades: Rough electrical, rough plumbing, HVAC ductwork
- Inspections: Rough-in inspections before any walls close
- Insulation and drywall: After inspections pass
- Finishes: Flooring, tile, cabinetry, millwork, paint
- Trim-out trades: Electrical fixtures, plumbing fixtures, HVAC registers
- Punch list: Final walkthrough and correction of deficiencies
Material lead times create schedule risk that most homeowners underestimate. Custom cabinetry typically takes 8–12 weeks from order to delivery. Windows and exterior doors can run 4–8 weeks. Specialty tile and appliances often have similar lead times. Ordering long-lead materials early, ideally at the same time you submit permit applications, prevents the most common schedule slips.
Add a schedule contingency of 20–30% to your total timeline. A project you estimate at 10 weeks should be planned for 12–13 weeks. This buffer absorbs inspection delays, back-ordered materials, and weather impacts without pushing your move-in date.
| Phase | Typical Duration | Key Dependency |
|---|---|---|
| Design and scope | 4–8 weeks | Decisions locked before permits |
| Permitting | 4–6 weeks | Complete drawings submitted |
| Demolition and structure | 1–3 weeks | Permit approved |
| Rough-in trades | 2–4 weeks | Structure complete |
| Drywall and insulation | 1–2 weeks | Rough inspections passed |
| Finishes and fixtures | 3–6 weeks | Materials on site |
| Punch list and closeout | 1–2 weeks | Substantial completion reached |
Pro Tip: Build a simple spreadsheet with each phase, its start date, duration, and the dependency it requires. Share it with your contractor and update it weekly. A shared schedule prevents the “I didn’t know you needed that done first” conversation.
How to manage the renovation build and closeout for success
Ambiguous leadership in renovation projects causes delays and increased costs. Designate one person as the single point of contact for all contractor communication. That person approves changes, signs off on work, and handles payments. When multiple family members give conflicting instructions to contractors, work stops or goes in the wrong direction.
Key management practices that protect your investment:
- Milestone payment schedule: Tie payments to completed phases, not calendar dates. Pay for demolition when demolition is done, not because two weeks have passed.
- Retain a final payment: Withhold 5–10% of the total contract until the punch list is fully complete. Milestone payments and retainage are the most reliable tools for ensuring contractors finish every last item.
- Document all changes in writing: Any change to scope, materials, or price must be confirmed in a written change order before work begins. Verbal agreements disappear.
- Track a live budget total: Update your working total immediately after each approved change order. This prevents the end-of-project shock of discovering you are $15,000 over budget.
Understanding the difference between substantial and final completion matters financially. Substantial completion means the space is usable and the warranty period begins. Final completion means every punch list item is resolved and triggers the release of your final payment. Do not release final payment at substantial completion.
“The punch list walkthrough is not a formality. Walk every room with your contractor, test every fixture, open every cabinet, and run every appliance. Write down every deficiency on a numbered list with a completion deadline. A punch list without deadlines rarely gets finished.”
Clear communication and regular weekly meetings prevent costly delays and scope misunderstandings. Schedule a standing 30-minute check-in with your contractor every week. Review the schedule, flag any material delays, and confirm the next two weeks of work. This habit alone prevents the majority of mid-project disputes.
Pro Tip: Review the project management guide for homeowners before your project starts. Understanding how to run a build meeting and read a schedule makes you a far more effective owner.
Key Takeaways
Successful renovation planning requires locking scope and budget before construction starts, sequencing trades correctly, and managing the build with documented milestones and a live budget total.
| Point | Details |
|---|---|
| Write a detailed scope | A written scope standardizes contractor bids and prevents costly misunderstandings. |
| Set contingency by home age | Budget 10–20% contingency for newer homes and 15–30% for older or complex projects. |
| Start permits early | Allow 6–12 months for projects with structural changes, including 6 weeks for permit approval. |
| Follow trade sequence strictly | Out-of-order work causes rework and schedule disruptions that cost more than the original task. |
| Use milestone payments and retainage | Withhold final payment until the punch list is complete to protect your investment. |
Why front-loading decisions is the hardest part of renovation planning
Most homeowners underestimate how much the pre-construction phase determines the outcome. Decisions made during construction are exponentially more costly than those made during design. Changing a wall location on paper costs nothing. Changing it after drywall is installed costs thousands in labor, materials, and schedule time.
The pattern I see most often is homeowners who rush through planning because they are eager to start construction. They treat the design phase as a formality and expect to “figure it out as they go.” That approach works fine for painting a room. It fails badly on anything involving trades, permits, or structural work.
Scope creep is the other consistent budget killer. A project starts as a bathroom remodel and ends up including a hallway floor replacement, a new linen closet, and upgraded lighting throughout. Each addition seems small. Collectively, they add 20–30% to the original budget and push the schedule by weeks. Defending your original scope is not inflexibility. It is financial discipline.
The homeowners who finish on budget are the ones who made hard decisions early, avoided common renovation mistakes, and treated the planning phase as seriously as the construction phase. They held weekly meetings, tracked every change order, and did not release payments until work was verified complete. That level of engagement is not micromanagement. It is ownership.
— Devin
Bidwolf makes finding the right contractor straightforward
Planning a renovation is only half the work. Finding a qualified, vetted contractor to execute that plan is where many homeowners lose time and money. Bidwolf connects you with licensed local contractors who compete for your project with transparent bids.

Post your project on Bidwolf’s platform and receive competitive bids from verified tradespeople in your area. You can compare bids side by side, message contractors directly, and track project milestones from your phone. Bidwolf’s network covers bathroom remodels, kitchen renovations, roofing, electrical, plumbing, and more. If you are ready to move from planning to building, find local contractors on Bidwolf and get your project started with confidence.
FAQ
What is the first step in planning a renovation?
Define your scope of work in writing before contacting any contractor. A written scope standardizes bids and prevents misunderstandings about what is included.
How much contingency should I budget for a renovation?
Budget 10–20% contingency for newer homes and 15–30% for older homes or projects with structural unknowns. Older homes regularly reveal hidden issues that require additional funds.
Do I need a permit for a bathroom or kitchen remodel?
Most bathroom and kitchen remodels that involve electrical, plumbing, or structural changes require permits. Contact your local building department before starting any work to confirm requirements.
How long does a typical home renovation take to plan?
Projects with structural changes or significant permitting need 6–12 months of planning lead time. Design takes roughly 2 months and permit approval typically takes 6 weeks.
When should I release the final payment to my contractor?
Release final payment only after all punch list items are complete, which marks final completion. Substantial completion, when the space is usable, does not trigger final payment release.