

Streamlining Your Home Renovation Process in 2026

TL;DR:
- Effective home renovation relies on locking in design choices early and sequencing trades in the correct order.
- Maintaining a 20 to 30 percent contingency fund helps absorb unexpected costs and prevents project delays.
Streamlining the home renovation process is the practice of organizing tasks, budgets, and communication to prevent delays, rework, and cost overruns before they start. Poor planning is the leading cause of renovation failure. Only 50% of home renovation projects finish on schedule, and 37% go over budget. The industry term for this discipline is renovation project management, and it covers everything from scope freeze and task sequencing to contractor selection and budget buffers. This guide gives you the exact strategies that keep projects on track, on budget, and far less stressful.
How does streamlining the home renovation process actually work?
Renovation project management is defined as the coordinated control of scope, schedule, budget, and communication across every phase of a remodel. The goal is simple: make decisions before construction starts, not during it. Mid-project design changes are the primary cause of scope creep, and every dollar spent on precise specs saves multiple dollars in rework. Homeowners who treat planning as the most important phase consistently finish faster and spend less.

Three concepts anchor every efficient renovation. The first is scope freeze, which means locking all design decisions before any contractor picks up a tool. The second is task sequencing, which means completing work in the correct physical order so no trade has to redo another’s work. The third is integrated team management, which means keeping communication centralized so nothing falls through the cracks. Master these three, and you control the project instead of the project controlling you.
How do planning and scope freeze reduce renovation delays?
Scope freeze is the formal decision to stop changing the project design once construction begins. It sounds obvious, but late fixture or finish decisions cause rough-in redos and waiting periods that can derail an entire schedule. Investing 10 extra planning hours upfront can avoid 10 weeks of project delays. That math makes early planning the highest-return activity in any remodel.
The practical way to achieve scope freeze is to finalize every material, fixture, and finish selection before signing a construction contract. This means choosing your tile, faucets, light fixtures, cabinet hardware, and flooring before demolition day. When a contractor knows exactly what goes where, they can order materials in advance, schedule trades back-to-back, and avoid the dead time that inflates labor costs. A detailed scope-of-work document, written before bidding begins, also gives you an apples-to-apples way to compare contractor bids without guessing what each one includes.
39% of homeowners exceed their initial renovation budgets. That figure drops significantly when homeowners use AI-powered tools to draft scope-of-work documents and standardize bid requests. AI tools can generate detailed line-item specs from a basic project description, which forces contractors to price the same work rather than their own interpretation of it. The result is a cleaner bid comparison and fewer surprise change orders after work begins.
Pro Tip: Build your full selections board, including paint colors, tile samples, and fixture model numbers, before you request a single bid. Contractors price what they know. Vague specs produce vague bids and expensive surprises.
What is the correct sequencing order for home renovation projects?
Proper task sequencing prevents 35% of cost overruns by ensuring trades and inspections happen in the right order. The sequence is not arbitrary. It follows physical dependencies, meaning each phase protects or enables the next. Skipping steps or reversing order forces rework that costs real money.
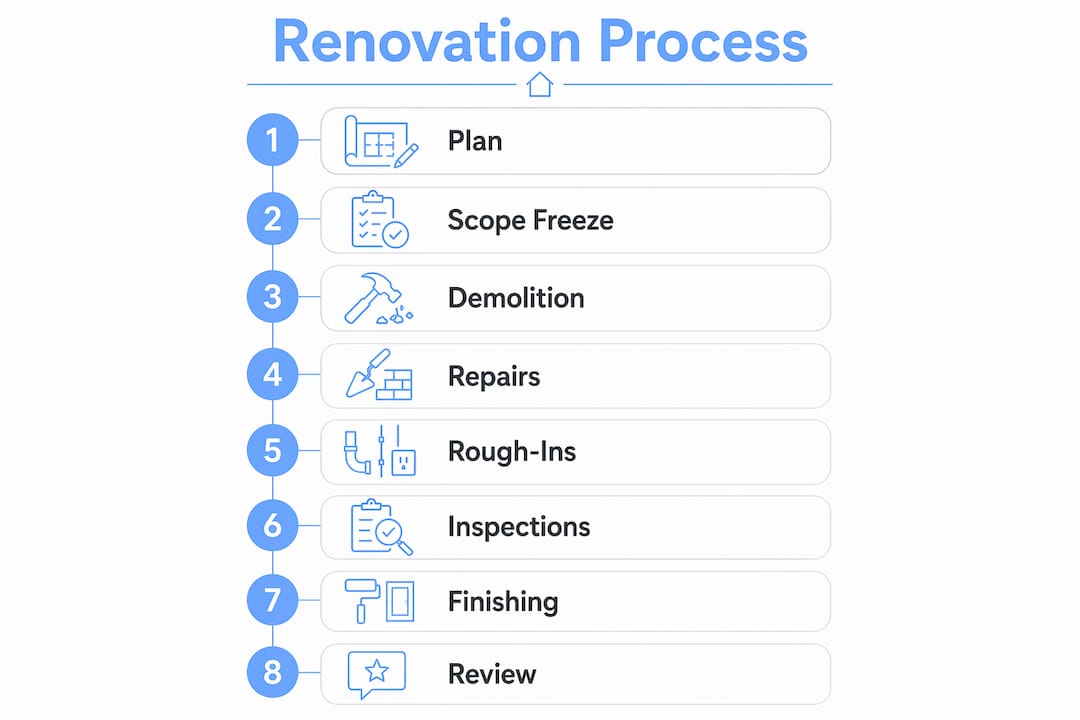
The standard sequence runs as follows: demolition first, then structural repairs, then mechanical rough-ins (plumbing, electrical, HVAC), then inspections, then insulation, then drywall, then painting, and finally flooring and finish work. Flooring installs last to avoid damage from other trades walking across it. Painting happens before flooring for the same reason. Each step in the chain protects the investment made in the step before it.
The table below shows each phase, its key activities, and the most common mistake homeowners make at that stage.
| Phase | Key activities | Common mistake |
|---|---|---|
| Demolition | Remove walls, fixtures, old flooring | Removing load-bearing elements without structural review |
| Structural | Framing, beam work, foundation repairs | Skipping a structural engineer for wall removal |
| Mechanical rough-ins | Plumbing, electrical, HVAC ductwork | Scheduling trades out of order, causing conflicts in walls |
| Inspections | Municipal sign-offs on rough-in work | Closing walls before inspection approval |
| Insulation | Batt or spray foam between studs | Installing before rough-ins are fully complete |
| Drywall | Hanging, taping, mudding, sanding | Rushing mud dry time, causing finish cracks |
| Painting | Primer and finish coats on walls and trim | Painting after flooring is installed |
| Flooring and finishes | Hardwood, tile, carpet, trim, fixtures | Installing flooring before painting is fully dry |
For a $40,000 project, sequencing errors alone add $4,000–$10,000 in avoidable expenses. That range covers the cost of a bathroom remodel in many markets. Getting the order right is not a technicality. It is a direct financial decision.
A practical way to manage sequencing is to build a simple Gantt-style schedule with each trade listed in order. Agile-style weekly check-ins with your contractor, even within a fixed-scope project, catch sequencing drift early before it becomes expensive. Short feedback loops keep everyone aligned without requiring a full-time project manager on site.
How can the design-build model make renovations more efficient?
Design-build remodeling is a delivery method where one firm handles both the architectural design and the physical construction under a single contract. The traditional approach separates these roles: you hire an architect, finalize drawings, then hire a contractor who may interpret those drawings differently. That gap between design intent and construction reality is where coordination overhead and inefficiencies multiply.
The design-build model eliminates that gap. One team holds both the design vision and the construction responsibility, which means there is no finger-pointing when something does not fit. Design-build reduces friction by maintaining one point of contact and a shared vision from design through construction. For homeowners, this translates to faster decisions, fewer miscommunications, and a shorter overall timeline.
The core advantages of the design-build approach include:
- Single point of accountability. One contract, one team, one phone number when problems arise.
- Faster design-to-build transition. The construction team reviews drawings as they develop, catching buildability issues before they become field problems.
- Reduced change orders. When designers and builders work together from day one, material conflicts and code issues surface during planning, not during construction.
- Compressed timelines. Maintaining a 20–30% budget buffer alongside a design-build model increases accountability and reduces timeline length in multi-phase projects.
- Clearer communication. Homeowners attend fewer meetings because the internal team resolves conflicts before escalating them.
Design-build works best for whole-home remodels, kitchen and bath renovations, additions, and any project where design complexity is high. It is less necessary for simple cosmetic updates like painting or flooring replacement, where the scope is already fixed and the design decisions are minimal.
Pro Tip: When interviewing design-build firms, ask to see a project where the original design changed significantly during construction. How they handled it tells you more about their process than any portfolio photo.
What tools and strategies help homeowners manage budget and contractors?
Budget control starts before the first contractor walks through your door. The most reliable strategy is to set a realistic budget, then add a 20–30% contingency on top of it. That buffer covers permit surprises, hidden damage behind walls, and the material price changes that are common in multi-month projects. Homeowners who skip the contingency fund frequently stall mid-project when unexpected costs appear.
A numbered approach to contractor management keeps the process clear:
- Draft a detailed scope-of-work document. List every task, material specification, and finish selection before requesting bids. Vague scopes produce incomparable bids.
- Request at least three bids. Use a home renovation checklist to confirm each bid covers the same scope before comparing prices.
- Verify licenses and insurance. Confirm each contractor holds a current state license and carries general liability and workers’ compensation coverage. For specialized work like mold remediation, professional certification is required and DIY approaches create serious safety and legal risks.
- Build a punch list before final payment. A punch list is a written record of incomplete or unsatisfactory work items. Maintaining a punch list of 5–10 items with photos and written descriptions makes it easier to schedule and price final corrections.
- Batch small repairs into single visits. Scheduling multiple small fixes in one contractor visit reduces mobilization costs and avoids multiple return trips.
AI-powered tools now help homeowners draft scope-of-work documents and compare contractor bids on a standardized basis. These tools are useful for planning and documentation, but they do not replace licensed professionals for structural, electrical, plumbing, or HVAC work. Homeowners often confuse cosmetic DIY tasks with structural work. Licensed pros are required for critical systems to avoid safety risks and code violations. You can review which renovation tasks require professionals before deciding what to handle yourself.
Pro Tip: Send your contractor a written summary after every site meeting. A two-sentence email confirming what was decided creates a paper trail that prevents “I thought you meant” disputes weeks later.
Key Takeaways
Efficient home renovation requires locking scope before construction, sequencing trades in the correct physical order, and maintaining a 20–30% budget buffer to absorb the unexpected costs that derail most projects.
| Point | Details |
|---|---|
| Scope freeze prevents overruns | Finalize all material and fixture selections before construction begins to eliminate costly change orders. |
| Sequencing order protects your budget | Follow demolition through finishes in the correct order to prevent rework that adds 10–25% to project costs. |
| Design-build reduces coordination gaps | One team managing design and construction cuts miscommunication and compresses timelines on complex projects. |
| Budget buffers absorb surprises | A 20–30% contingency fund prevents mid-project stalls when hidden damage or permit issues arise. |
| Documentation drives accountability | Written scope-of-work documents, punch lists, and meeting summaries protect you throughout the project. |
What I’ve learned from watching renovations go wrong
Most renovation failures I’ve observed share one trait: the homeowner made major decisions after construction started. A tile choice made on week three of a four-week bathroom project sounds harmless. In practice, it means the tile setter leaves, the plumber returns to adjust a drain location, the tile setter comes back, and the project runs three weeks over schedule. The cost is not just money. It is the compounding frustration of a project that never seems to end.
The scope freeze concept gets dismissed as overly rigid by homeowners who want flexibility. What they are actually asking for is the freedom to change their minds at the most expensive possible moment. Rigidity in planning is not a constraint. It is the thing that gives you a finished kitchen by the date you were promised.
I’ve also seen the design-build model misunderstood as a premium-only option. It is not. Many mid-market remodeling firms operate this way, and the efficiency gains often offset the slightly higher upfront design fee. The real premium is the time you do not spend mediating between your architect and your contractor at 7:00 PM on a Tuesday.
The most underrated tool in any renovation is a simple shared document. A Google Doc with the scope, material selections, and a running log of decisions costs nothing and prevents the majority of disputes I’ve seen escalate to withheld final payments. Technology does not need to be sophisticated to be effective. It needs to be used consistently.
— Devin
How Bidwolf helps you manage your renovation from bid to completion
Bidwolf connects homeowners with vetted, local contractors across Texas, giving you a direct path from project idea to competitive bids without the phone tag and guesswork of traditional contractor searches.

Post your project on Bidwolf’s project platform and receive bids from license-verified professionals who have already been screened for credentials and insurance. Bidwolf’s built-in messaging keeps all contractor communication in one place, so your scope documents, bid comparisons, and project updates stay organized from day one. You can also find local contractors by trade and location, making it straightforward to build the right team for your specific project. Whether you are planning a kitchen remodel, a bathroom update, or a full home renovation, Bidwolf gives you the tools to move from planning to construction with confidence.
FAQ
What does scope freeze mean in home renovation?
Scope freeze is the decision to lock all design choices, material selections, and finish specifications before construction begins. It prevents mid-project changes that trigger costly rework and schedule delays.
How much budget buffer should I keep for a renovation?
A 20–30% contingency fund above your base budget is the standard recommendation for home renovation projects. This buffer covers permit issues, hidden structural damage, and material price changes.
What is the correct order of trades in a home renovation?
The standard sequence runs: demolition, structural work, mechanical rough-ins (plumbing, electrical, HVAC), inspections, insulation, drywall, painting, and then flooring and finish work last. Following this order prevents one trade from damaging or redoing another’s completed work.
What is design-build remodeling and who should use it?
Design-build remodeling is a delivery method where one firm manages both design and construction under a single contract. It works best for complex projects like whole-home remodels, kitchen renovations, and additions where coordination between design and construction is critical.
How do I compare contractor bids fairly?
Write a detailed scope-of-work document before requesting bids, then confirm each contractor has priced the same tasks and materials. Bids without a fixed scope are not comparable and often lead to change orders after work begins.